如何使用 SELinux 保护和管理文件访问
导语:在本文中,我们探讨了内核级修改的替代方案:安全增强型 Linux (SELinux) 中的自定义策略和沙箱。我们研究如何使用它们进行事件记录和监视、限制文件访问以及控制自定义沙箱内的系统调用。
监控和限制对潜在恶意文件的访问可以使您的产品免遭黑客攻击、数据泄露和破坏。为了在基于Linux的环境中做到这一点,开发人员通常必须进行内核级修改,这实现起来很复杂,并且对系统来说存在风险。
在本文中,我们探讨了内核级修改的替代方案:安全增强型 Linux (SELinux) 中的自定义策略和沙箱。我们研究如何使用它们进行事件记录和监视、限制文件访问以及控制自定义沙箱内的系统调用。
为什么要限制 Linux 环境中的文件访问?
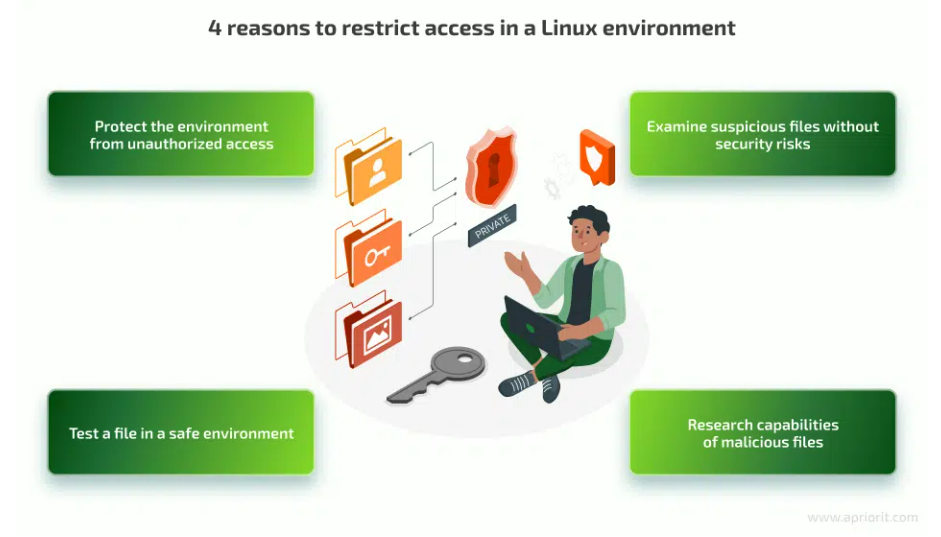
在创建软件解决方案时(无论是简单的驱动程序还是复杂的网络安全系统),保护您的产品免遭未经授权的访问非常重要。对于开发基于 Linux 的产品的团队来说,监视和管理数据和文件访问的常见原因包括:

有几种传统方法可以做到这一点:创建Linux 内核模块来挂钩文件操作、设置挂钩来监视和控制进程等。传统的限制访问方法通常需要高级技术专业知识,并且会给开发过程带来额外的复杂性。它们还可能向您的环境添加严重错误,因为它们通常需要内核级更改。这就是为什么只有当您需要对文件的访问权限进行细致的控制时,此类方法才有用。
当您只需要监视、允许或拒绝访问而不需要任何其他更改时,最好使用SELinux。该系统集成到 Linux 内核中,为开发人员提供强制访问控制的方法。SELinux 为 Linux 环境中的元素设置上下文并通过策略对其进行管理。SELinux 提供了一个强大的沙箱,允许您在有限的环境中执行进程。此环境利用 SELinux 策略来定义沙箱中运行的进程的约束和权限。使用此类策略可以让开发人员有效地增强其应用程序的安全状况。
使用 SELinux 管理文件访问有几个优点:
· 简单的政策管理。SELinux 的策略文件是人类可读的,因此无需学习特定语法来编写策略。
· 精细的访问控制。您可以在策略中指定任何访问限制和权限。
· 可靠的文件隔离。为了控制对文件的访问,SELinux 将其放入沙箱中,将文件与环境的其余部分隔离。
· 简化访问管理。更改策略中的访问权限比实施和进行内核级修改要容易得多。
在详细探索如何使用 SELinux 之前,请确保有一个适合创建 SELinux 策略的环境。请注意,在本示例中,我们使用 Fedora Workstation 和 Red Hat Enterprise Linux 发行版。默认情况下,这些系统上启用了 SELinux,但最好在继续我们的指南之前仔细检查您的系统是否启用了 SELinux。
设置SELinux环境
在将 SELinux 策略应用于生产系统之前,请确保在测试或开发环境中执行此处描述的步骤。错误配置的策略可能会影响系统功能和安全性。
如果您的 Linux 发行版不包含 SELinux,您可以通过打开终端并以 root 用户身份执行以下命令来启用它:
$ sudo dnf install selinux-policy-targeted
安装完成后,重新启动系统。重新启动后,SELinux 将启用并在强制模式下运行。要确认其安装成功,请打开终端并执行以下命令:
$ sestatus
SELinux status:                 enabled
SELinuxfs mount:                /sys/fs/selinux
SELinux root directory:         /etc/selinux
Loaded policy name:             targeted
Current mode:                   enforcing          <<<<<<<<<< This line describes current mode
Mode from config file:          enforcing
Policy MLS status:              enabled
Policy deny_unknown status:     allowed
Memory protection checking:     actual (secure)
使用 SELinux 对进程进行沙箱处理
默认情况下,沙箱工具利用多类别安全(MCS) 模型来实施细粒度的访问控制和进程隔离。该模型根据每个进程和文件的安全级别和类别为其分配唯一的安全标签。
让我们在沙箱中运行 /bin/bash 进程,以限制它访问敏感文件或执行某些命令。
要创建沙箱并在其中启动 /bin/bash,我们使用沙箱命令,如下所示:
$ sandbox -H sandbox_test /bin/bash
沙箱工具应用 SELinux 策略将进程限制在沙箱内。这些策略定义进程的访问权限、系统调用限制和文件限制。策略确保进程只能访问沙箱配置允许的资源并执行操作。在幕后,它们生成随机 MCS 编号并将其设置为我们进程的 SELinux 安全上下文。策略还标记了我们的流程可用的相应文件。
例如,将 SELinux 沙箱用于 /bin/bash 进程,主目录位于 sandbox_test 中,将导致ls -lZ我们的目录出现以下输出:
$ ls -lZ | grep sandbox_test
drwxr-xr-x. 2 user user unconfined_u:object_r:sandbox_file_t:s0:c146,c312      49 May  3 06:50 sandbox_test
在我们的例子中,随机 MCS 数是c146和c312。/bin/bash 进程使用这些数字运行,根据沙箱源代码它将获取 SELinux 安全上下文执行命令:
$ ps -eZ | grep bash
unconfined_u:unconfined_r:sandbox_t:s0:c146,c312 172662 ? 00:00:00 bash
该策略有效地将我们的 bash 进程限制在其主目录中。但是,此解决方案仅适用于特定文件夹,并限制对具有随机 MCS 编号的特定文件的访问。具有相同主文件夹的另一个沙盒 bash 会与此冲突。为了克服这一限制,我们可以利用沙箱工具及其源代码的知识来创建自定义 SELinux 策略,限制对特定 SELinux 类型的访问。
在接下来的部分中,我们将探讨两种类型的 SELinux 策略:
· 宽松的策略,不会阻止任何连接,仅监视和记录安全事件,包括违规行为。当您需要测试、调试或研究文件时,宽松策略非常有用。
· 一种强制策略,用于建立文件的访问权限并限制任何禁止的活动。它对于建立访问管理和保护您的解决方案非常有用。
让我们从建立一个宽松的 SELinux 策略示例开始。
制定宽松政策
要为 /bin/bash 这样的简单进程创建 SELinux 策略,我们可以使用该sepolicy generate命令。让我们运行以下命令,为 /bin/bash 进程生成策略文件,并将其命名mybash:
$ sudo sepolicy generate --application /bin/bash -n mybash
mybash.te 文件包含我们策略的人类可读的 SELinux 规则。接下来,我们需要启用从 unconfined_t 域到自定义 mybash_t 域的转换。为此,我们将以下宏包含在 mybash.te 文件中:
unconfined_run_to(mybash_t, mybash_exec_t)
该宏允许在执行 /bin/bash 进程时在域之间进行转换,并使我们能够通过setexeccon为特定进程设置自定义 SELinux 域类型。
我们的策略文件现在如下所示:
policy_module(mybash, 1.0.0)
########################################
#
# Declarations
#
attribute_role mybash_roles;
roleattribute system_r mybash_roles;
type mybash_t;
type mybash_exec_t;
application_domain(mybash_t, mybash_exec_t)
role mybash_roles types mybash_t;
unconfined_run_to(mybash_t, mybash_exec_t)
permissive mybash_t;
########################################
#
# mybash local policy
#
allow mybash_t self:capability { chown setgid setuid };
allow mybash_t self:process { fork setpgid setrlimit signal_perms };
allow mybash_t self:fifo_file manage_fifo_file_perms;
allow mybash_t self:unix_stream_socket create_stream_socket_perms;
domain_use_interactive_fds(mybash_t)
files_read_etc_files(mybash_t)
auth_use_nsswitch(mybash_t)
logging_send_syslog_msg(mybash_t)
miscfiles_read_localization(mybash_t)
sysnet_dns_name_resolve(mybash_t)
要为 /bin/bash 进程安装此自定义策略并允许 /bin/bash 进程在指定的 SELinux 上下文下运行,让我们执行自动生成的脚本:
$ sudo ./mybash.sh
要直接从 bash shell 设置进程上下文,我们可以使用一个简单的代码片段。让我们创建一个新文件,将其命名为 set_context.c,并向其中添加以下代码:
#include <selinux/selinux.h>
#include <stdio.h>
#include <stdlib.h>
#include <unistd.h>
#include <errno.h>
int main(void) {
    security_context_t context_old = {0};
    security_context_t context_new = {0};
    if (getcon(&context_old) == -1) {
        printf("Failed to get context");
        return 1;
    }
    printf("%s\n", context_old);
    if (setexeccon((security_context_t)"unconfined_u:unconfined_r:mybash_t:s0") == -1) {
        printf("Failed to set context errno %d\n", errno);
        return 1;
    }
    execve("/bin/bash", NULL, NULL);
    return 0;
}
现在我们将构建并运行此代码:
$ gcc -o mybash set_context.c -lselinux
$ ./mybash
$
此代码检索当前 SELinux 上下文,将新上下文设置为unconfined_u:unconfined_r:mybash_t:s0,然后使用更新的上下文执行 /bin/bash 进程。
现在我们对 /bin/bash 进程有了一个宽松的策略,并且可以在指定的 SELinux 上下文中执行它。让我们打开另一个终端并检查 /var/log/audit/audit.log。在这里我们可以看到bash启动后请求了什么样的权限:
type=AVC msg=audit(1683645539.705:301246): avc: denied { append } for pid=173167 comm="bash" name=".bash_history" dev="dm-1" ino=1225470 scontext=unconfined_u:unconfined_r:mybash_t:s0 tcontext=unconfined_u:object_r:user_home_dir_t:s0 tclass=file permissive=1

type=SYSCALL msg=audit(1683645539.705:301246): arch=c000003e syscall=257 success=yes exit=3 a0=ffffff9c a1=55bdf355c5f0 a2=401 a3=0 items=0 ppid=172599 pid=173167 auid=1000 uid=1000 gid=1000 euid=1000 suid=1000 fsuid=1000 egid=1000 sgid=1000 fsgid=1000 tty=pts2 ses=32 comm="bash" exe="/usr/bin/bash" subj=unconfined_u:unconfined_r:mybash_t:s0 key=(null)ARCH=x86_64 SYSCALL=openat AUID="sboy" UID="sboy" GID="sboy" EUID="sboy" SUID="sboy" FSUID="sboy" EGID="sboy" SGID="sboy" FSGID="sboy"

type=AVC msg=audit(1683645539.705:301247): avc: denied { setattr } for pid=173167 comm="bash" name=".bash_history" dev="dm-1" ino=1225470 scontext=unconfined_u:unconfined_r:mybash_t:s0 tcontext=unconfined_u:object_r:user_home_dir_t:s0 tclass=file permissive=1

type=SYSCALL msg=audit(1683645539.705:301247): arch=c000003e syscall=92 success=yes exit=0 a0=55bdf355c5f0 a1=3e8 a2=3e8 a3=55bdf355c7a0 items=0 ppid=172599 pid=173167 auid=1000 uid=1000 gid=1000 euid=1000 suid=1000 fsuid=1000 egid=1000 sgid=1000 fsgid=1000 tty=pts2 ses=32 comm="bash" exe="/usr/bin/bash" subj=unconfined_u:unconfined_r:mybash_t:s0 key=(null)ARCH=x86_64 SYSCALL=chown AUID="sboy" UID="sboy" GID="sboy" EUID="sboy" SUID="sboy" FSUID="sboy" EGID="sboy" SGID="sboy" FSGID="sboy"
请注意包含所请求权限类型和模式的拒绝字段permissive=1,这实际上意味着此 SELinux 策略允许这些权限,并且只是在audit.log 中警告它们。
现在,让我们在自定义 bash 进程中执行 ls 命令,看看不带参数执行此命令需要什么:
type=AVC msg=audit(1683645670.511:301248): avc: denied { read } for pid=173244 comm="ls" name="setcon" dev="dm-1" ino=1211972 scontext=unconfined_u:unconfined_r:mybash_t:s0 tcontext=unconfined_u:object_r:user_home_t:s0 tclass=dir permissive=1

type=SYSCALL msg=audit(1683645670.511:301248): arch=c000003e syscall=257 success=yes exit=3 a0=ffffff9c a1=562f22c913d0 a2=90800 a3=0 items=0 ppid=173219 pid=173244 auid=1000 uid=1000 gid=1000 euid=1000 suid=1000 fsuid=1000 egid=1000 sgid=1000 fsgid=1000 tty=pts2 ses=32 comm="ls" exe="/usr/bin/ls" subj=unconfined_u:unconfined_r:mybash_t:s0 key=(null)ARCH=x86_64 SYSCALL=openat AUID="sboy" UID="sboy" GID="sboy" EUID="sboy" SUID="sboy" FSUID="sboy" EGID="sboy" SGID="sboy" FSGID="sboy"
有了ls,我们可以继续处理 /bin/bash 进程并了解如何使用 SELinux 强制执行访问控制。
制定执行政策
audit.log 文件中的 SELinux 日志描述了 /bin/bash 进程执行的操作。我们将通过注释掉“permissive”行并删除任何其他自动生成的权限来禁用自定义策略中的permissive 模式。此后,该策略将生效,这意味着 SELinux 将阻止所有不需要的访问尝试。
更新后的政策现在如下所示:
policy_module(mybash, 1.0.0)
########################################
#
# Declarations
#
attribute_role mybash_roles;
roleattribute system_r mybash_roles;
type mybash_t;
type mybash_exec_t;
application_domain(mybash_t, mybash_exec_t)
role mybash_roles types mybash_t;
unconfined_run_to(mybash_t, mybash_exec_t)
#permissive mybash_t;
########################################
#
# mybash local policy
#
#allow mybash_t self:capability { chown setgid setuid };
#allow mybash_t self:process { fork setpgid setrlimit signal_perms };
#allow mybash_t self:fifo_file manage_fifo_file_perms;
#allow mybash_t self:unix_stream_socket create_stream_socket_perms;
#domain_use_interactive_fds(mybash_t)
#files_read_etc_files(mybash_t)
#auth_use_nsswitch(mybash_t)
#logging_send_syslog_msg(mybash_t)
通过删除权限,我们有效地限制了 /bin/bash 进程的 SELinux 上下文。让我们安装更新的策略并尝试运行新的自定义 bash:
$ sudo ./mybash.sh
$ ./mybash
但是,这只会在日志中产生一行:
type=AVC msg=audit(1683646222.408:301270): avc: denied { entrypoint } for pid=173428 comm="mybash" path="/usr/bin/bash" dev="dm-1" ino=16959619 scontext=unconfined_u:unconfined_r:mybash_t:s0 tcontext=system_u:object_r:shell_exec_t:s0 tclass=file permissive=0不幸的是,我们的 bash 进程缺乏启动所需的权限。为了解决这个问题,让我们使用命令生成权限audit2allow 并更新我们的策略:
$ echo 'type=AVC msg=audit(1683646222.408:301270): avc:  denied  { entrypoint } for  pid=173428 comm="mybash" path="/usr/bin/bash" dev="dm-1" ino=16959619 scontext=unconfined_u:unconfined_r:mybash_t:s0 tcontext=system_u:object_r:shell_exec_t:s0 tclass=file permissive=0' | audit2allow -r

require {
type mybash_t;
type shell_exec_t;
class file entrypoint;
}

#============= mybash_t ==============
allow mybash_t shell_exec_t:file entrypoint;
接下来,让我们将生成的行添加到 mybash.te 文件的末尾并安装更新的策略:
$ sudo ./mybash.sh
$ ./mybash
Segmentation fault
即使进行这些修改后,bash 进程仍然无法启动,从而导致分段错误。所以我们需要将这一行添加到audit.log中:
type=AVC msg=audit(1683646840.208:301287): avc: denied { map } for pid=173620 comm="bash" path="/usr/bin/bash" dev="dm-1" ino=16959619 scontext=unconfined_u:unconfined_r:mybash_t:s0 tcontext=system_u:object_r:shell_exec_t:s0 tclass=file permissive=0让我们重复一下权限生成步骤:
$ echo 'type=AVC msg=audit(1683646840.208:301287): avc:  denied  { map } for  pid=173620 comm="bash" path="/usr/bin/bash" dev="dm-1" ino=16959619 scontext=unconfined_u:unconfined_r:mybash_t:s0 tcontext=system_u:object_r:shell_exec_t:s0 tclass=file permissive=0' | audit2allow -r
require {
type shell_exec_t;
type mybash_t;
class file map;
}
#============= mybash_t ==============
#!!!! This avc can be allowed using the boolean 'domain_can_mmap_files'
allow mybash_t shell_exec_t:file map;
现在我们可以更新 mybash.te 文件并再次运行它。我们仍然遇到分段错误,但在audit.log 中有一条新记录:
type=AVC msg=audit(1683647173.571:301297): avc: denied { execute } for pid=173774 comm="bash" path="/usr/bin/bash" dev="dm-1" ino=16959619 scontext=unconfined_u:unconfined_r:mybash_t:s0 tcontext=system_u:object_r:shell_exec_t:s0 tclass=file permissive=0当我们再次生成权限后,mybash.te文件将合并启动/bin/bash进程的权限。现在,我们的最终政策允许启动该流程:
policy_module(mybash, 1.0.0)
########################################
#
# Declarations
#
attribute_role mybash_roles;
roleattribute system_r mybash_roles;
type mybash_t;
type mybash_exec_t;
application_domain(mybash_t, mybash_exec_t)
role mybash_roles types mybash_t;
unconfined_run_to(mybash_t, mybash_exec_t)
require {
type mybash_t;
type shell_exec_t;
class file entrypoint;
class file map;
class file execute;
}
#============= mybash_t ==============
allow mybash_t shell_exec_t:file { map entrypoint execute };
总体而言,此策略允许 mybash_t 域中的进程通过映射、作为入口点访问并执行它们来与 shell_exec_t 文件进行交互。该require 部分指定 mybash_t 文件类型与其他文件类型交互所需的权限。
这些allow 语句定义授予 mybash_t 域的权限。这个过程如下所示:
allow mybash_t shell_exec_t:file map; - allows the "mybash_t" domain to map files of type "shell_exec_t".
allow mybash_t shell_exec_t:file entrypoint; - allows the "mybash_t" domain to access files of type "shell_exec_t" as entry points.
allow mybash_t shell_exec_t:file execute; - allows the "mybash_t" domain to execute files of type "shell_exec_t".
最后,我们可以再次更新策略并在自定义域中启动 bash 进程:
$ sudo ./mybash.sh
$ ./mybash
bash-5.1$ ls
bash: child setpgid (173932 to 173932): Permission denied
bash: /usr/bin/ls: Permission denied
我们创建了自定义策略,允许我们在强制模式下运行可执行文件并管理其 SELinux 权限。这也使我们能够以宽容模式简单地监视进程操作并礼貌地管理应用程序。
通过这种方法,我们不需要在内核模块中实现自定义钩子来管理读/写操作,并且我们可以通过 SELinux 策略来管理进程操作。但是,我们只能以 SELinux 允许的方式执行此操作,因此我们必须使用 SELinux 文件类型并管理对它们的访问。
结论
监控和管理访问是保护任何产品的重要组成部分。对于 Linux 开发,访问管理通常基于内核级修改和挂钩,这使用起来很棘手,并且可能会引入稳定性问题。
相反,您的团队可以利用 SELinux 灵活的访问控制机制来定义自定义策略。此类策略可以帮助您的团队监控安全事件,并准确规定进程可以访问哪些文件类型以及允许进行哪些系统调用。
发表评论


 提供云计算服务